Have you ever let a brilliant app idea die simply because you didn’t know how to code? It’s common to see non-technical founders wanting to build a Micro SaaS business or simple extensions, only to find they lack the technical background to actually execute their idea.
But I’m here to tell you that the landscape has changed. From my own experience, you don’t need to be a “techy” anymore, nor do you need to hand over your concepts (and cash) to an agency just to kickstart your business idea.
You can build pretty powerful apps without writing a single line of code nowadays through the use of no-code tools.
There is a catch, though. You need to be familiarized with the different no-code bundles that help with this workflow, specifically understanding how their User Interfaces work and how to leverage them. In this post, I’ll walk you through exactly how to do that.
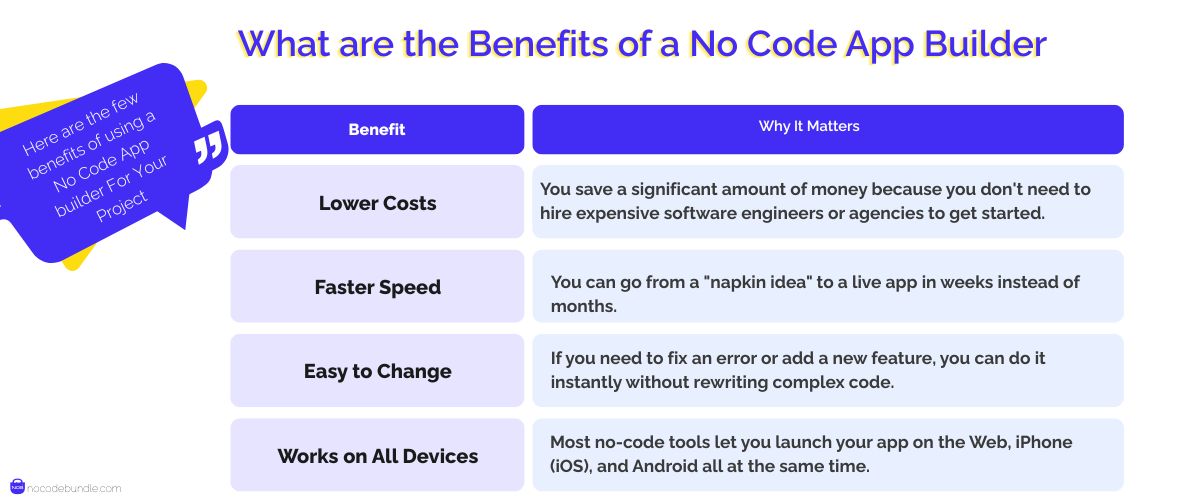
What are the Benefits of a No Code App Builder
Simply put, “No-Code” removes the barrier of complex syntax, allowing you to build applications using Prompts, visual interfaces and drag-and-drop logic.
Here are the few benefits of using a No Code App builder For Your Project
To truly understand the future of this tech, you should explore What is a No-Code AI App Builder, which explains how AI is supercharging the building process.
Individuals are the ones who reap the most benefit out of this. It is exactly what OpenAI CEO Sam Altman quoted:
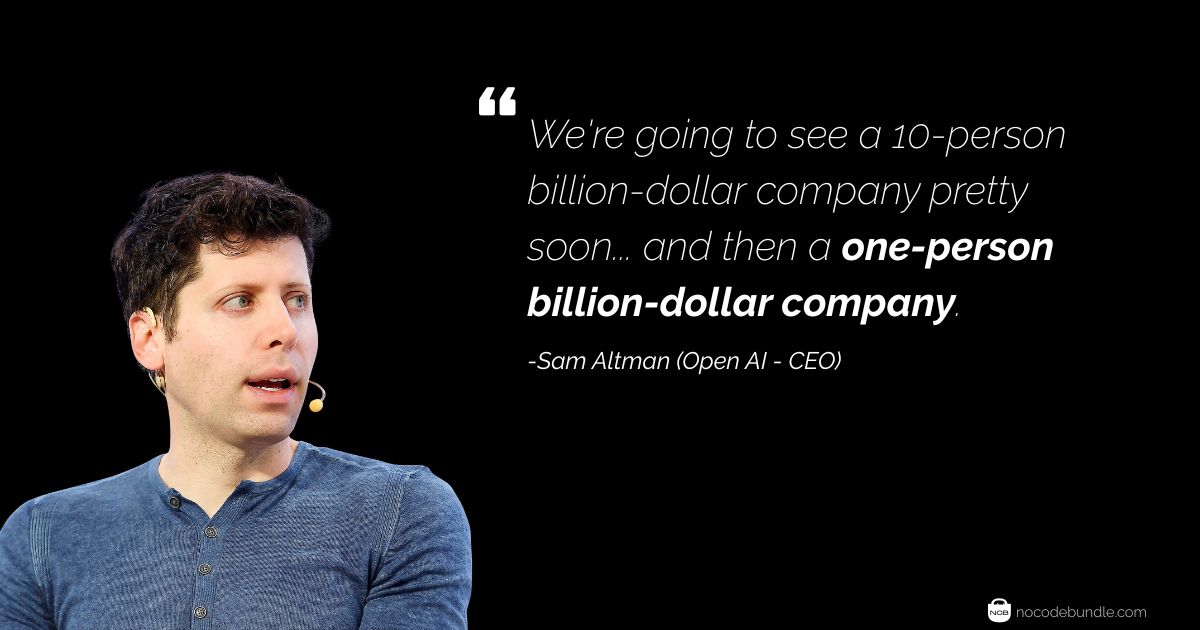
So, how does a one-person team compete with a giant? It comes down to efficiency of the No Code App builder you choose. The speed at which you can create apps is far quicker than traditional coding. What would usually take you months to develop can be shortened to weeks by using a no-code tool like Bubble or FlutterFlow.
For a bootstrapping founder, this agility is non-negotiable.
It prevents you from committing too much of your time or resources to a project without first validating the product with a simple MVP which you can now create in record time.
How to build a No Code App? Complete Guide
Now this is pretty long if you don’t have the attention span to go through it here are the key takeaways to browse through the section you want
- Research Before You Build means validating your niche, solving a real pain point, and proving demand before opening any no-code tool.
- Define the Workflow First by mapping logic, data, and screens on paper to avoid chaos and drastically reduce build time.
- Choose the Right No-Code Tool by matching it to your app’s logic and use case, not trends or marketing hype.
- Design the Front End with Structure by sketching first, then using AI, drag-and-drop, and containers for clean, responsive layouts.
- Build the Back End Visually by using workflows, AI prompts, databases, and privacy rules instead of writing traditional code.
1. Your Project Idea? Is it well researched??
We need to start with a reality check before you open any no-code tool. No false promises here: if you are a complete non-techy, please restrain from developing something complex.
Don’t have false expectations of projecting yourself as Mark Zuckerberg developing Facebook in his dorm room.
If you try to build some complex idea as your first project, you will hit a wall.
Always know that No-Code tools are best for throwaway projects or Micro SaaS projects. You can even build simple extensions for Chrome, WordPress, or Shopify and earn from them. But to ensure you are building something people actually want.
Follow this battle-tested process:
Step 1: The "Niche" Audit
Have a thorough idea on what your niche is whether it’s a sales, marketing, ecommerce, business, or social tool. You need to know about your competitors and user needs first even before starting with app design.
I know gathering data is tedious, so I did some of the heavy lifting for you.
About the market study part, Here is the Google Sheet from Starter Story contains the list of the best Micro SaaS businesses (some of them started as one-man projects and later on scaled) that are already generating revenue. It has details on what they do, the industry, the platform, and the price range.
Step 2: The "Pain Killer" Test
Once you pick a niche and the product idea to serve them, find how well it can solve the user’s pain point or help with work productivity.
This is where many founders get lost; they build “cool” features instead of useful ones.
What the users need is convenience, Hell, I’m even subbed to a simple scraper tool for making my side easier. It’s not a fancy app with AI bells and whistles; it just does one specific job that I hate doing manually and I love using it.
That is the mindset you need. If your idea doesn’t blatantly save someone time or money (like that scraper does for me), go back to the drawing board. Focus on utility, not complexity.
Step 3: The "Smoke" Screen (Validation)
Before you touch the design tools, you need to prove people care. This is called a “Smoke Screen.”
Run a Survey: Hop into communities (like Reddit or niche Facebook groups) and ask them about the specific problem you are solving. Don’t pitch your app; just ask about the pain point to see if they react.
A/B Test Your Messaging: Spin up a simple landing page. Run two versions of the headline (A/B testing) to see which benefit makes people click “Join Waitlist.”
The “Fake Door”: Add a “Buy” button even if the product doesn’t exist yet. If they click it, tell them you are “launching soon.” If nobody clicks, you just saved yourself months of work.
2. Creating an App Project Workflow
STOP! Do not open the app builder yet.
Opening the editor without a workflow is the fastest way to build a messy, broken app that you will eventually delete.
Building without a blueprint isn’t agility; it’s chaos.
Here is the process I follow to translate an idea into a logical workflow that a machine understands.
Step 1: Map the "If-This-Then-That" Logic
Computers are literal. They don’t know that a “Buy” button means “take money and send an email.” You have to tell them.
Grab a piece of paper or a tool like Miro or Whimsical. You need to draw a flowchart that dictates exactly what happens at every interaction.
How to do it: Start with the user’s entry point. Draw a box for “User Clicks Sign Up.” Draw an arrow to the next action: “Create Account in Database.” Draw another arrow: “Redirect to Dashboard.”
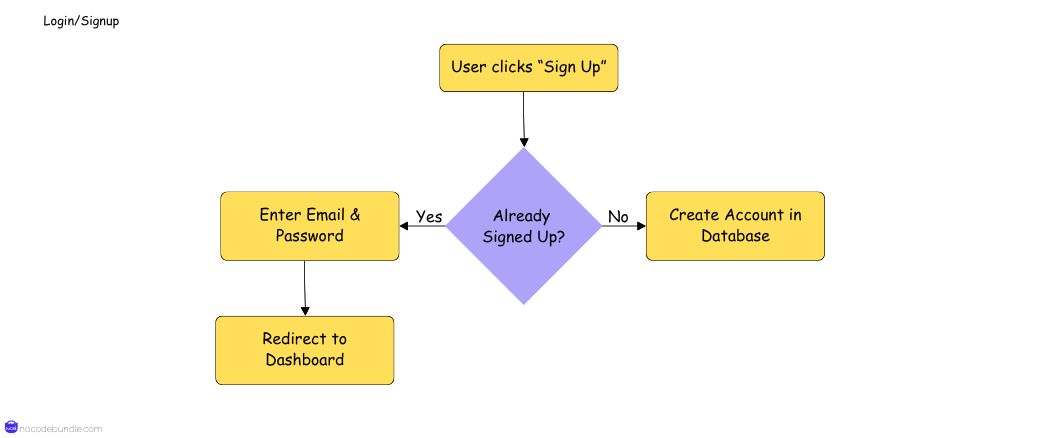
The Feature Subset: This visual map is actually you designing the Workflows and Conditional Logic you will later build in tools like Bubble or Glide. By deciding now that “If the user is not logged in -> Redirect to Home,” you are pre-writing the logic rules you will need later.
Step 2: Define the "Backbone" (Your Database)
This is the part that scares most non-techies, but it is actually quite simple. Every app is just a pretty interface sitting on top of a spreadsheet.
How to do it: List out the “Things” your app needs to remember. If you are building a marketplace, your “Things” are: Users, Products, and Orders.
The Feature Subset: In the no-code world, these are called Data Types or Collections.
Under Users, list the fields: Name, Email, Profile Photo.
Under Products, list: Price, Description, Image.
The Connection: Draw lines between them. A User “creates” a Product. This defines the Data Relationships (what developers call specific database linking) that your app builder will ask for.
Step 3: The "Napkin" Wireframe
Now that you have the logic and the data, you can sketch the screens.
How to do it: Don’t worry about colors, fonts, or rounded corners. Just draw boxes representing the screens (Home, Login, Profile). Place the elements where they need to go based on the flowchart you made in Step 1.
The Feature Subset: This step defines your Container Layout and Navigation Architecture. When you eventually move to the app builder, you won’t be guessing where to put the menu; you will simply be digitizing the sketch you already validated.
3. Selecting the Tool
This is where “Analysis Paralysis” usually kicks in. There are hundreds of tools out there, and countless founders waste weeks just trying to decide between Tool A and Tool B. To narrow down your options, you can start by comparing the Best No Code App Builders to see which features align with your project goals.
The truth is, there is no “best” tool, only the right tool for your specific logic. You shouldn’t pick a platform just because it’s trending on Twitter. You need a selection process.
Here is how I filter through the noise to find the right No Code Tool for a project:
Don’t trust the marketing slogans on a tool’s homepage. Of course they will say they can build anything. You need proof!
Before picking a tool, you must go through the case studies of apps similar to your functionalities that are actually built on those platforms. You can usually find these on the website’s own “Resources” or “Showcase” pages or better browse in communities and forums.
Also, A question often get asked constantly by first-time builders is:
Do I need to design the Front-End and Back-End separately?
If you are new to this game, here is the breakdown: The Front-End is what your user sees (the buttons, colors, and layout), while the Back-End is the brain (the database, servers, and logic).
The answer is: It depends on the tool.
However, for most solopreneurs, you want simplicity. Yes, there are apps that come as “Full-Stack” builders, like Bubble. This means you build the visual interface and the database in the exact same window. You don’t need to glue two different services together.
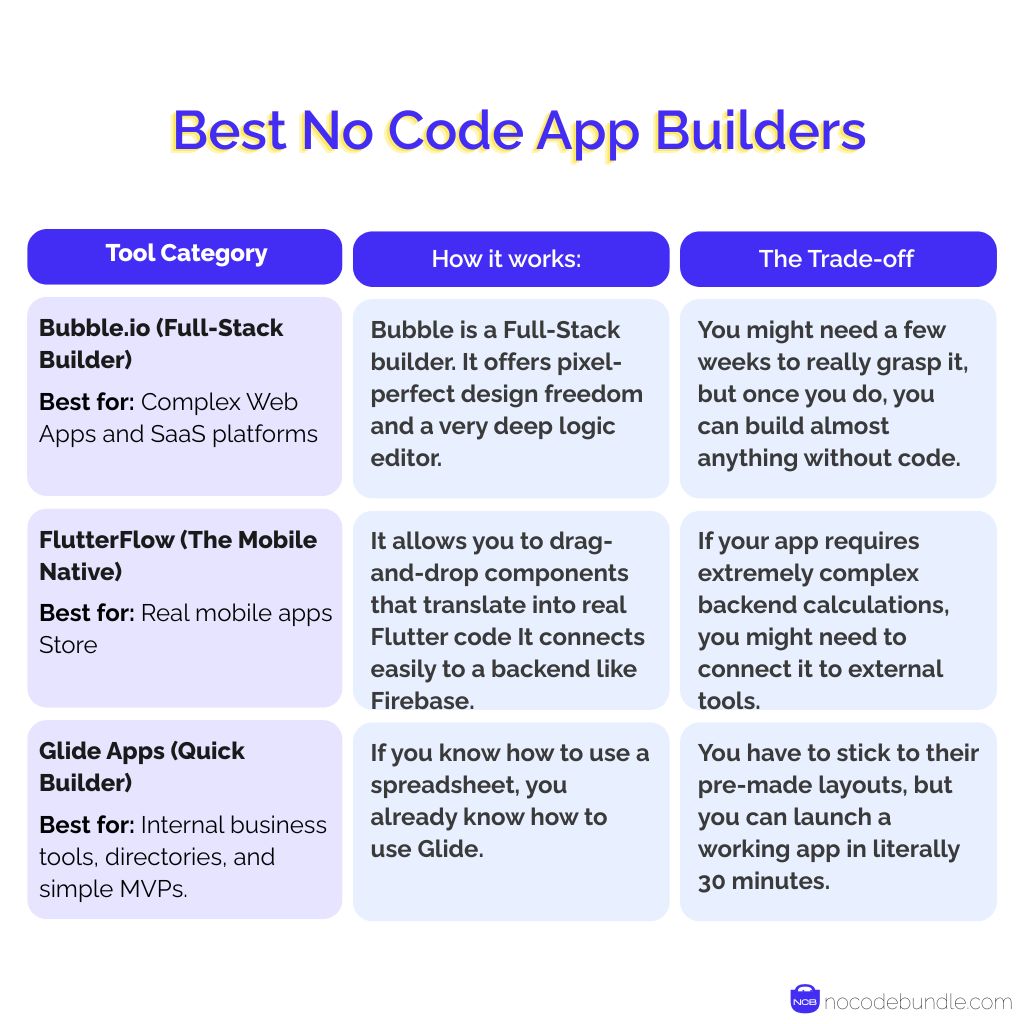
My "Big Three" Recommendations
Based on my experience, you will likely fall into one of these three buckets.
- Bubble.io
- FlutterFlow
- Glide Apps
Here is how to choose:
4. Designing The Front End
Now that you have your workflow mapped out, it is time to build the interface. You don’t need to worry about being a professional designer to make something that looks good, but you should have a plan before you start clicking buttons.
Step 1: Start on Paper
Take a pen and a notebook and create a rough sketch of your app’s UI and functionalities. Don’t overthink this part. You don’t need to be a pro artist here; just scribble like a 10-year-old.
To make this even more useful, I often use a simple trick: Upload your sketch to an image generation platform to even better your outputs. This converts your rough drawing into a cleaner visual reference that you can follow when you start building.
Step 2: The Building Process
Once you open your no-code tool, the process usually follows these three specific steps:
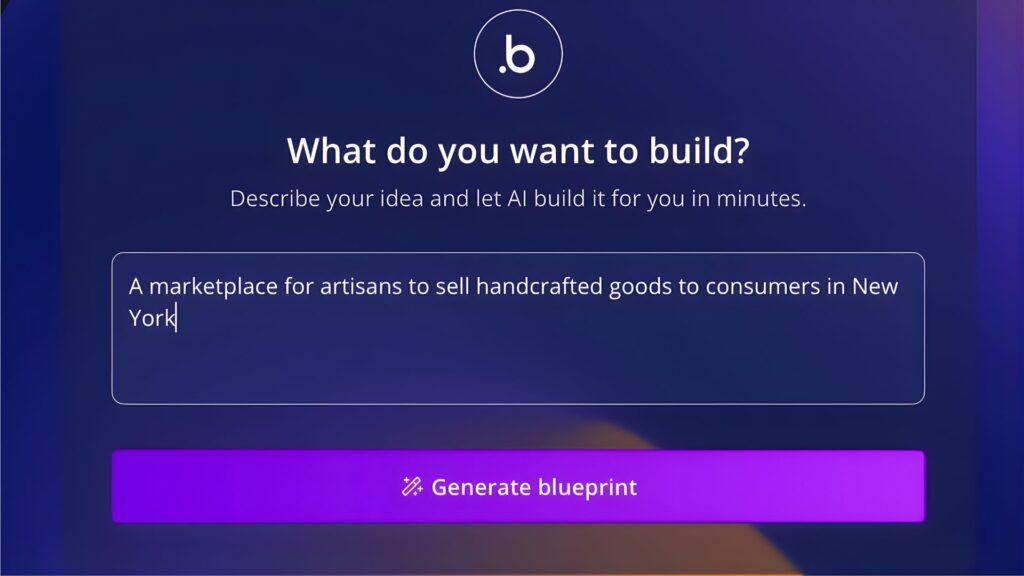
1. AI Text-to-App
Most modern builders now include an AI feature to help you start. Instead of facing a blank white screen, you can type a prompt like “Create a dashboard with a sidebar and a user profile.” The tool will generate the initial layout for you. It serves as a good base that you can edit later.
2. Drag-and-Drop
On one side of your screen, you will see a library of elements (Text, Buttons, Images). To build your page, you simply click an element and drag it onto the canvas.
Styling: When you click on an item you placed, a settings panel will appear. This is where you adjust the look. Instead of writing code to change a color or round the corners of a button, you just select options from a menu or use sliders.
3. Grouping Elements (Responsive Design)
This is the practical part. You cannot just place items randomly; you need to structure them.
How it works: You place elements inside “Containers” or “Groups.” Think of these as boxes that hold your content together. This tells the software how to organize the page so that it looks correct on both a large computer screen and a small mobile phone.

What if I only need to design the UI/UX of the app using No code tools (I can build custom backend code myself)?
This is a valid approach, especially if you are a developer who prefers writing your own backend logic but wants to save time on the visual design.
To answer this: You don’t need full-stack tools. While full-stack builders are powerful, they might be unnecessary for your needs. Instead, you should choose tools that focus primarily on the interface and allow you to connect to your own external database or API.
Here are the best options for this approach:
Webflow: This is a strong choice for web-based applications. It gives you precise control over the visual design and exports clean code that you can connect to your backend.
FlutterFlow: If you are building a mobile app, this tool allows you to design the UI visually and connect it to your custom SQL database or API endpoints easily.
Glide Apps: This is a good option if you want a polished UI without much design work. You provide the data source (your custom backend), and Glide Apps generates a standard, functioning interface for you automatically.
5. Designing the Back End
Designing the back end involves defining how your application stores information and how it processes user actions. You need to determine how data enters the system, where it is stored, and who has permission to access it.
Step 1: Think in "Workflows," Not Code
This is how modern visual builders handle the heavy lifting. Instead of writing scripts, you build Workflows.
How it works:
You define a Trigger and an Action.
- The Trigger: You click a specific element in your design, like a “Sign Up” button.
- The Action: You select a plain-English command from a list, such as “Sign the user up,” “Send an email,” or “Create a new database entry.”
You are essentially mapping out the logic visually. You tell the system what to do, and the platform handles how to execute the code in the background.
I can design app UI/UX & front end but don’t know the back end?
If you are a designer or non-technical creator, you no longer need to fear the logic phase. Get familiarized with Vibe Coding. This is essentially using Large Language Models (LLMs) and natural language prompts to generate code or logic for you. You don’t need to know the syntax or how to write a function; you just need to describe the result you want.
You use an AI assistant within your development tool and type a prompt like: “Create a workflow that saves the user’s input, calculates the total price including tax, and sends them a receipt via email.”
The AI interprets your request and builds the necessary backend logic or code blocks instantly.
Step 2: Build Your Database
This is where you organize your data. You need to look for apps that let you create custom databases, user logins, role-based permissions, and automate workflows all without code.
The Process:
Define your “Things”: If you are building a rental app, your things are Users, Properties, and Bookings.
Connect them: In the database tab of your no-code tool, you create a relationship. You tell the system that a Booking belongs to a specific User.
The front end is customizable for forms, tables, dashboards, and even maps, so you can make your app look polished while keeping full control of the backend.
Step 3: Secure Your Data
You don’t want every user to see everyone else’s data. In no-code tools, you handle this through Privacy Rules.
How it works:
You set a condition using logic statements. For example:
- Condition: “When ‘This User’ is ‘Current User’…”
- Permission: “…they can view this data.”
This ensures that when a user logs in, they only see their own profile or dashboard.
Recommended Tools
To turn your design into a functional app, I suggest looking into tools that specialize in this visual logic:
- FlutterFlow: Great for turning high-fidelity designs into mobile apps.
- Xano: If you want a powerful standalone backend to connect to any frontend.
- Airtable: Good for simple, spreadsheet-style databases.
Automation can’t do these things very well. It can translate your design to code, but it can’t interpret it very well. You still need to be careful with how you build. Making a good application is not only about how it looks, it’s also about accessibility, usability, performance and semantics.
Ashna Antony
Ashna Antony is a Hubspot Certified Content Marketer interested in the AI and SaaS landscape. A former Software Developer turned writer, she breaks down how tech actually works and why it matters. She writes about Generative AI, AI Tools, Website Builders, and SaaS. When she’s AFK, she’s probably adding songs to a Spotify playlist or halfway through a podcast episode.